Learn how to start a blog in 2024 with my easy-to-follow guide. As someone who once struggled to figure it out, I’ve created this resource to simplify the process. Discover how to launch your WordPress blog using Namecheap hosting and start sharing your passion with the world.
How to Start a Blog in 2024: Your Ultimate Guide
Are you ready to dive into the exciting world of blogging? Whether you want to share your passion, build a business, or simply express yourself, starting a blog in 2024 is easier than ever. This step-by-step guide will walk you through the process of creating your very own blog using WordPress and Namecheap hosting. Let’s get started!
Step 1: Choose Your Blogging Niche
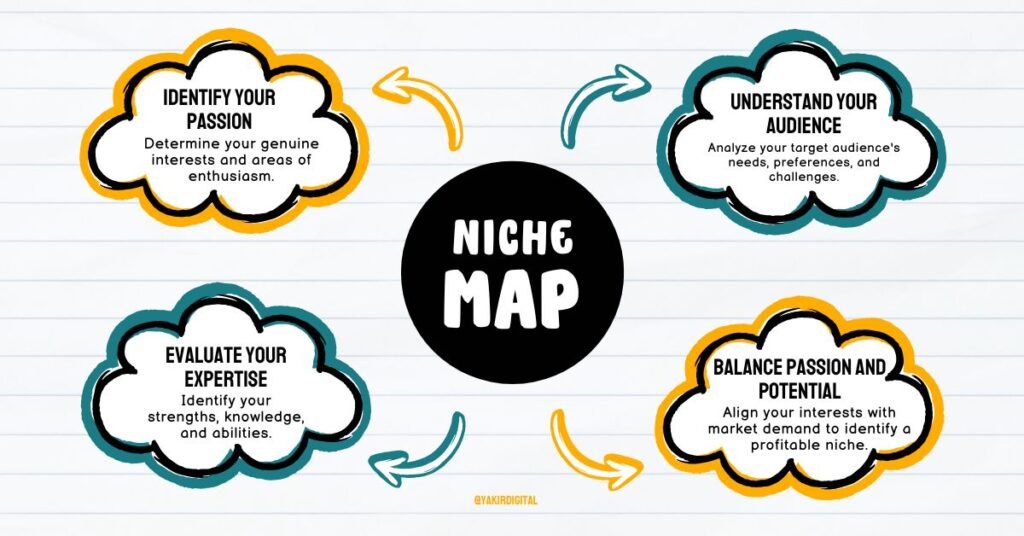
Before you start setting up your blog, it’s crucial to decide what you’ll be writing about. Your niche is the topic or area you’ll focus on in your blog posts. Here are some tips to help you choose:
- List your passions and interests
- Consider your expertise or skills
- Research potential audience demand
- Look for a balance between your interests and market potential
Remember, it’s easier to create content consistently when you’re genuinely interested in your topic.
Step 2: Set Up Your Domain and Hosting with Namecheap
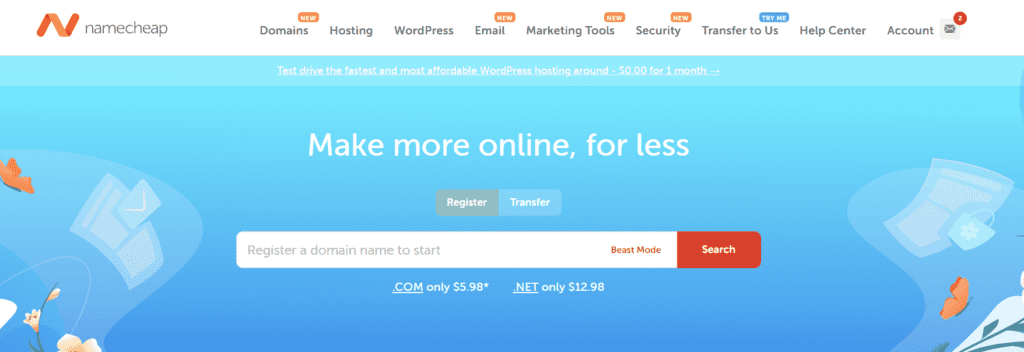
Now that you’ve chosen your niche, it’s time to give your blog a home on the internet. This involves two key components: a domain name and web hosting.
What’s the Difference?
- Domain Name: Your blog’s unique address on the internet for example www.yourblogname.com.
- Web Hosting: The digital space where your blog’s files are stored and accessible.
Think of a domain name as the address of your house and web hosting as the land it sits on. Your domain name is the specific location where people can find your blog online, while web hosting is the platform that provides the space for your blog to exist. Just as you need land to build a house, you need web hosting to create a website.
Choosing a Domain Name
Find a domain starting at $0.99
powered by Namecheap
Your domain name is your blog’s online identity, so selecting the perfect one is crucial. It’s your virtual storefront sign, inviting visitors to explore your digital world. Strive for a name that’s short, memorable, and accurately reflects your blog’s focus. While incorporating relevant keywords can boost search engine visibility, simplicity should be prioritized. Remember, a great domain name is easy to spell, remember, and type.
Key Tips for Choosing a Domain Name:
- Keep it short and memorable
- Make it relevant to your niche
- Avoid hyphens and numbers if possible
- Consider using keywords related to your topic
Setting Up Hosting with Namecheap
Namecheap offers reliable and affordable hosting perfect for new bloggers. Here’s how to get started:
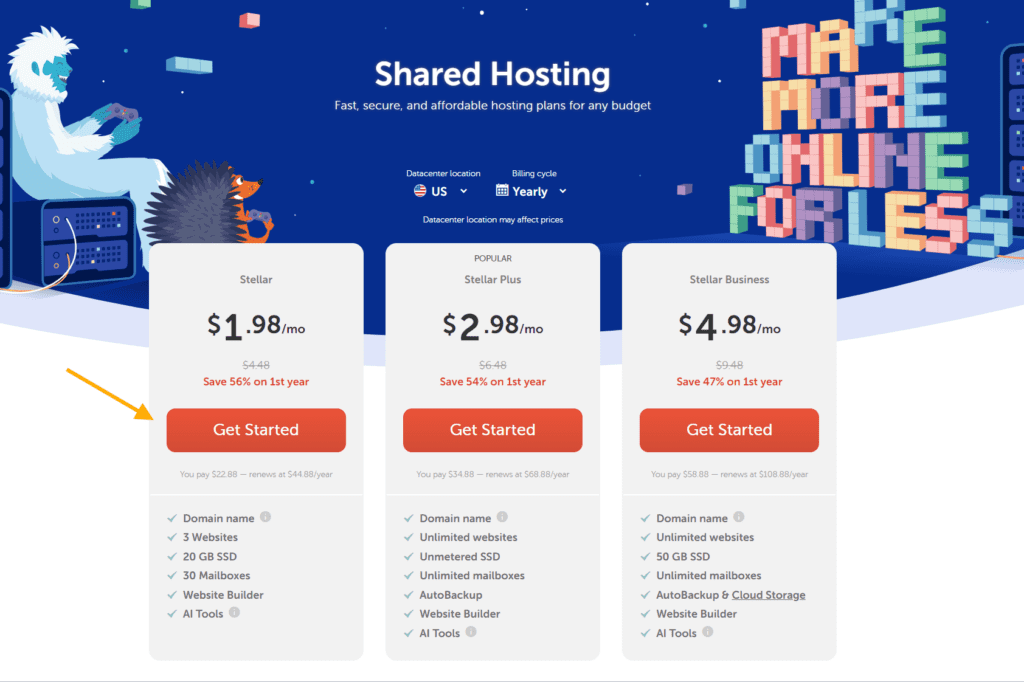
- Go to Namecheap.com and create an account
- Choose a hosting plan (the basic plan is usually sufficient for new blogs)
- Select your domain name (you can register a new one or use one you already own)
- Complete the purchase process
Step 3: Install WordPress on Your Namecheap Hosting
WordPress is a powerful and user-friendly blogging platform. Namecheap makes it easy to install WordPress
with just a few clicks:
1. Log in to your Namecheap account and go to the hosting dashboard
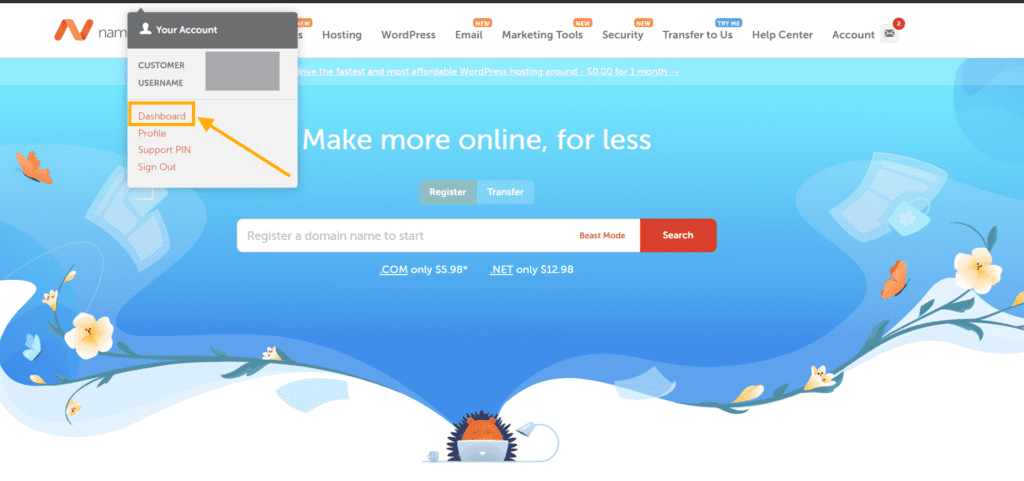
2. Go to “hosting list” tab and than go to c panel
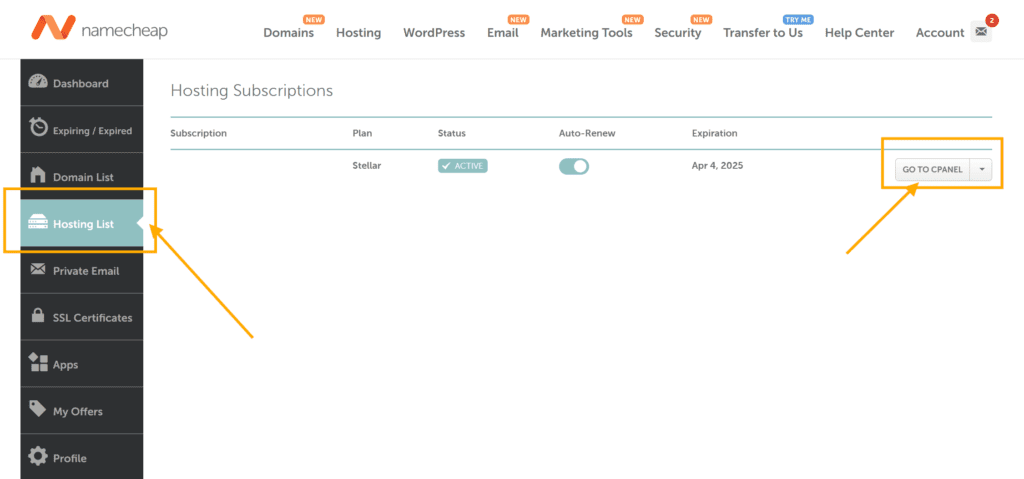
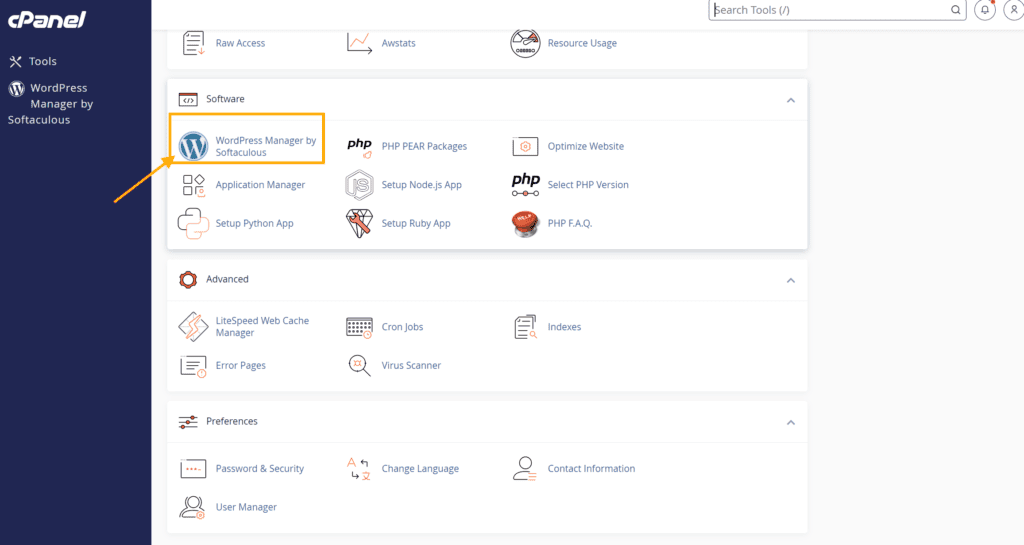
3. On the c-panel dashboard Look for the “WordPress” Icon
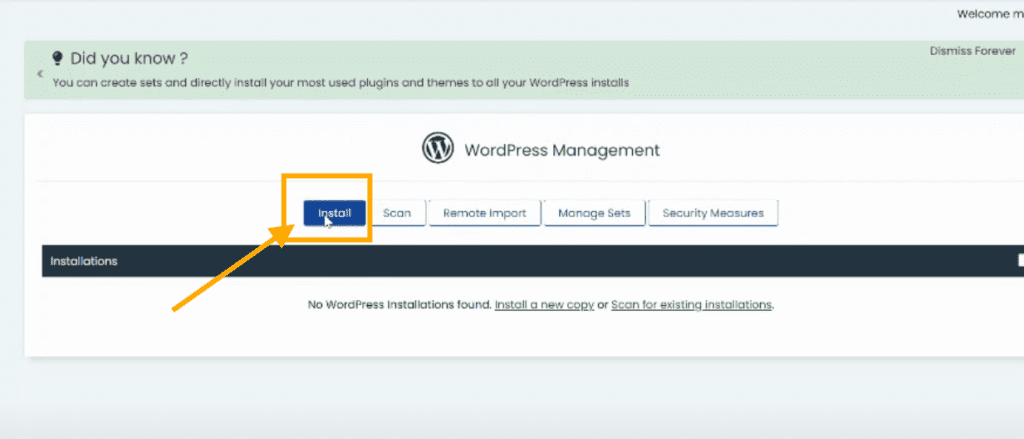
4. Click “Install”
5. Follow the prompts to set up your WordPress login credentials
Once installation is complete, you can access your WordPress dashboard
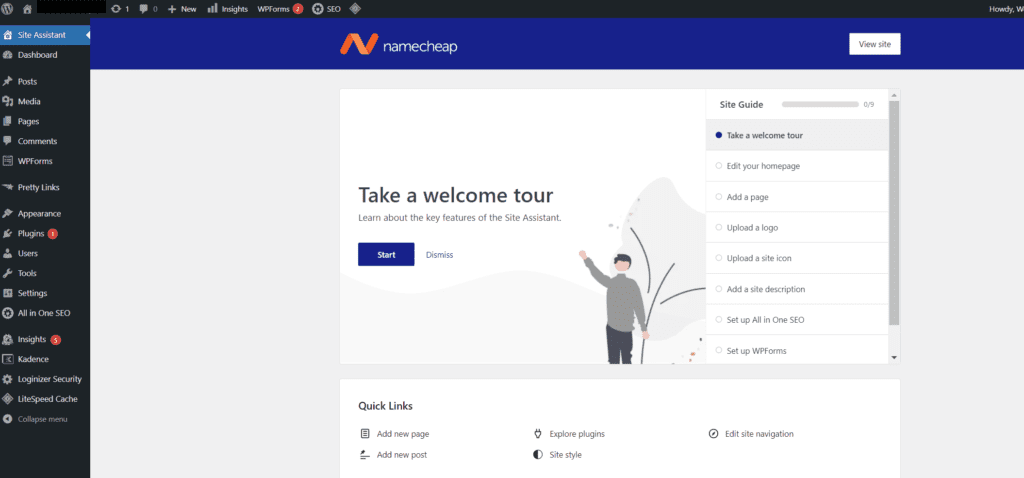
Step 4: Choose and Customize Your WordPress Theme
Your theme determines how your blog looks. WordPress offers many free and paid themes to choose from. Here’s how to select and customize your theme:
1. In your WordPress dashboard, go to Appearance > Themes
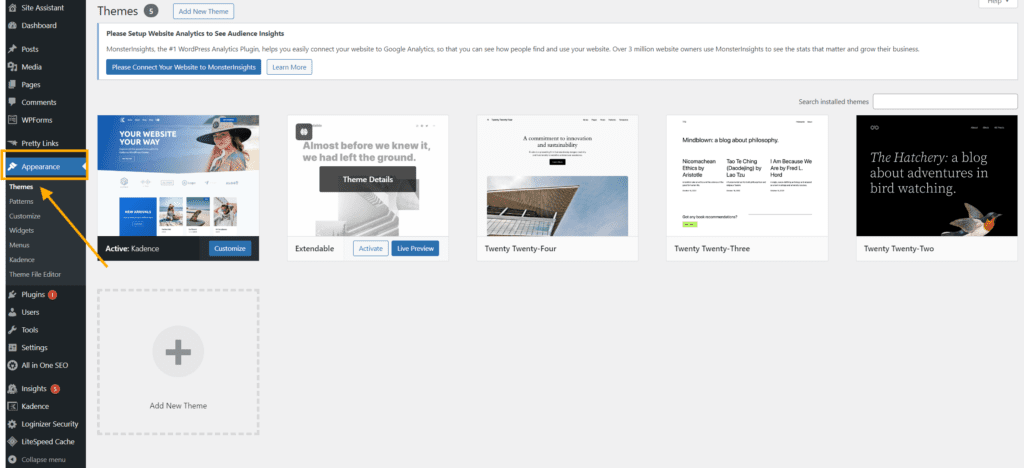
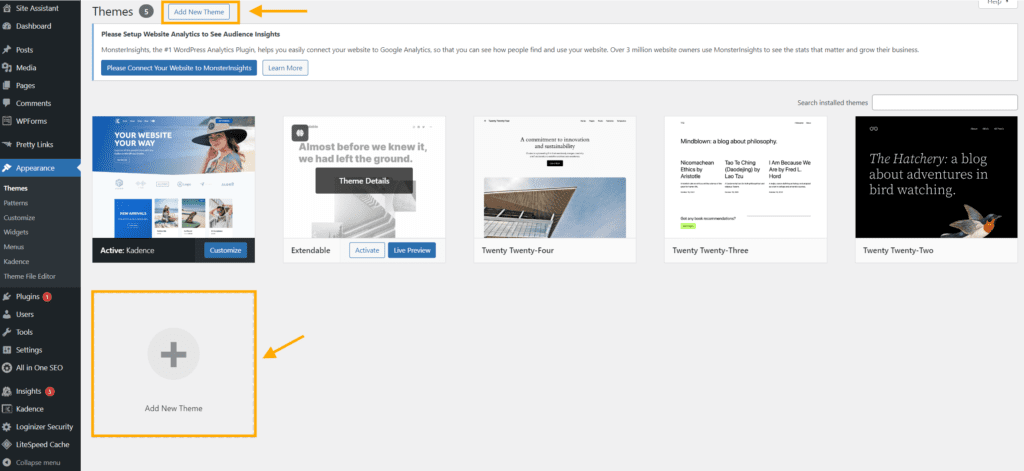
2. Browse the available themes or click “Add New” to find more
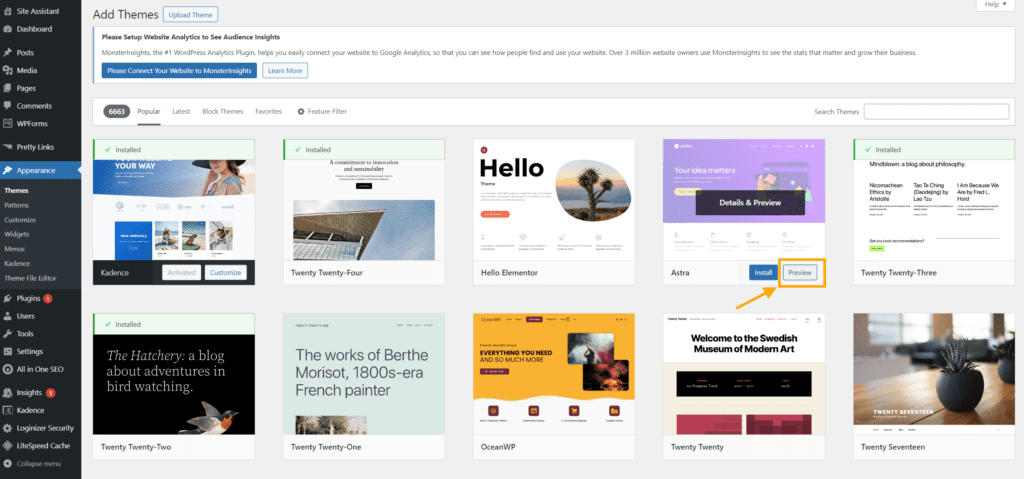
3. Preview themes to see how they look with your content
- Once you’ve found a theme you like, click “Install”
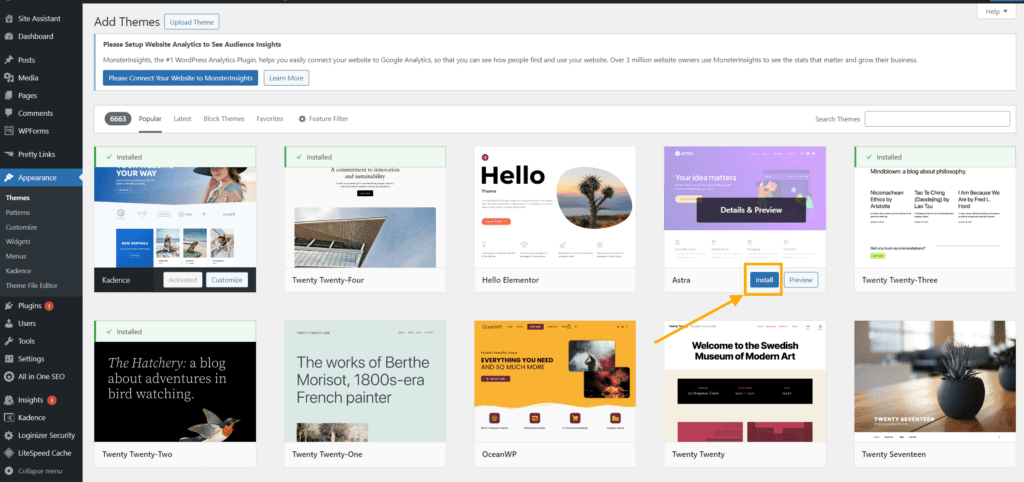
5. Once you’ve found the perfect theme for your blog, it’s time to make it live. Simply click the “Activate” button to apply the theme to your website. Your blog will instantly take on the look and feel of your newly selected design.
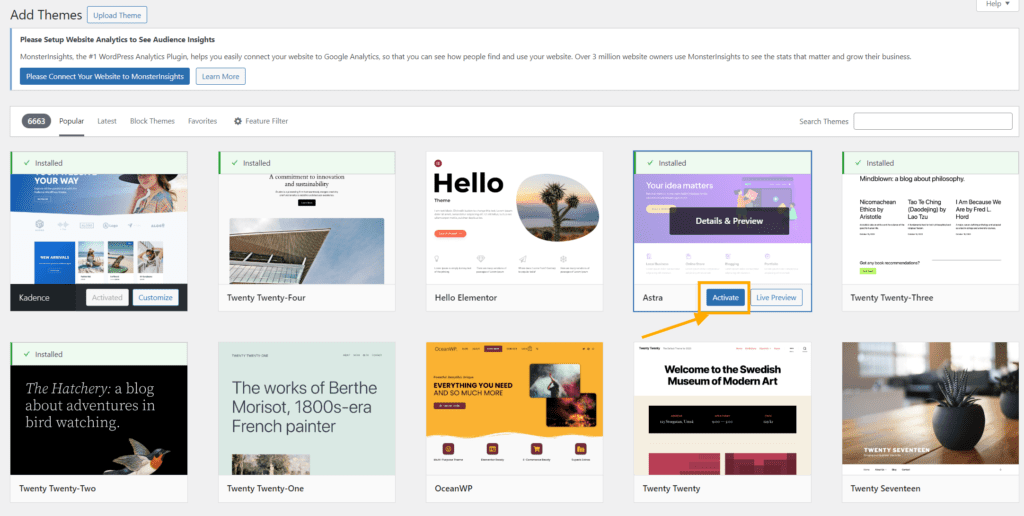
Now let’s customize your theme:
To customize your theme, navigate to the Appearance section of your WordPress dashboard and select the “Customize” option. This will open a live preview of your website, allowing you to make changes without affecting the published version of your blog.
1. Go to Appearance > Customize
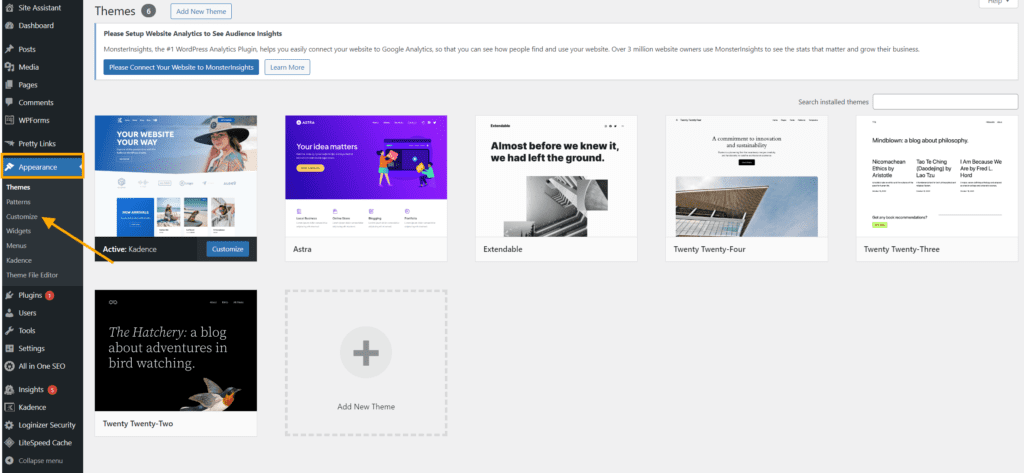
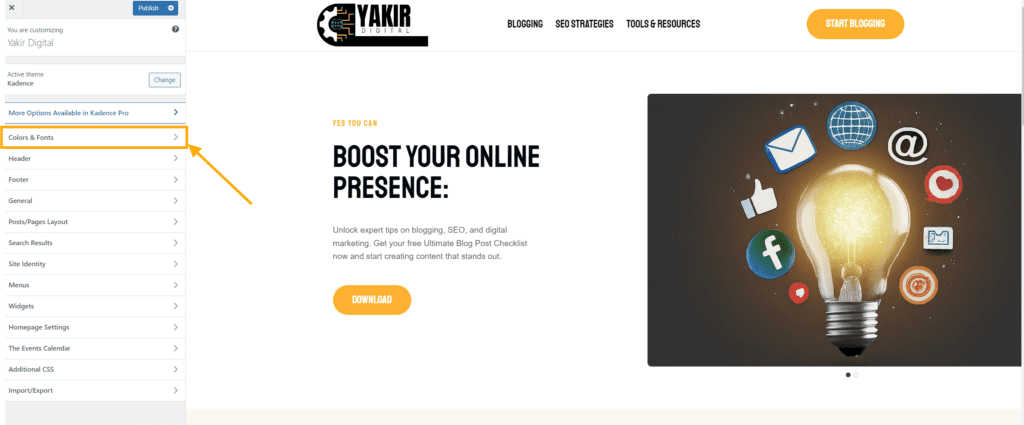
2. Experiment with colors, fonts, and layouts to create a unique look and feel for your blog
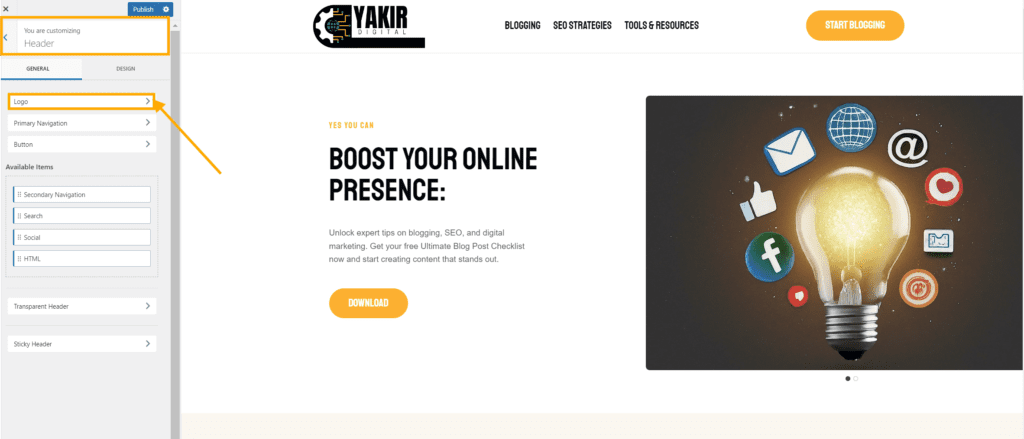
3. Add a touch of professionalism and brand recognition to your blog by incorporating your logo
4. Don’t forget to click the “Publish” button to save all your hard work. This crucial step will make your customized theme visible to the world, showcasing your unique style and branding.
Step 5: Create Essential Pages for Your Blog
Every blog needs a few key pages to provide information to your readers:
- About Page: Tell your story and explain what your blog is about
- Contact Page: Provide a way for readers to get in touch with you
- Privacy Policy: Explain how you handle user data (especially important if you plan to monetize your blog)
To create these pages:
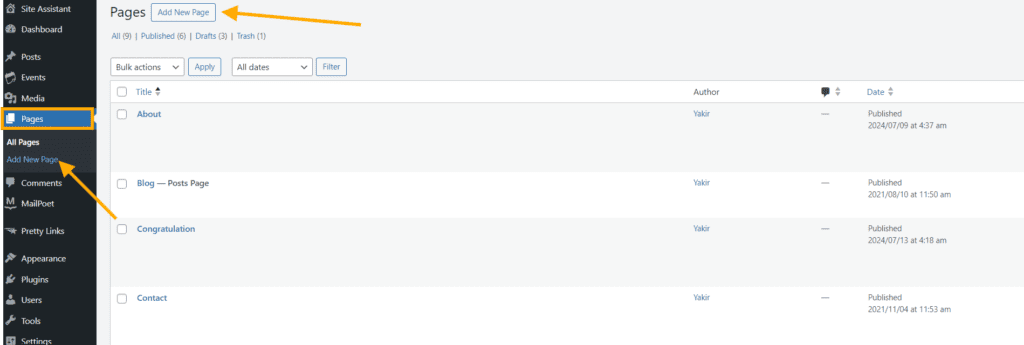
1. In your WordPress dashboard, go to Pages > Add New
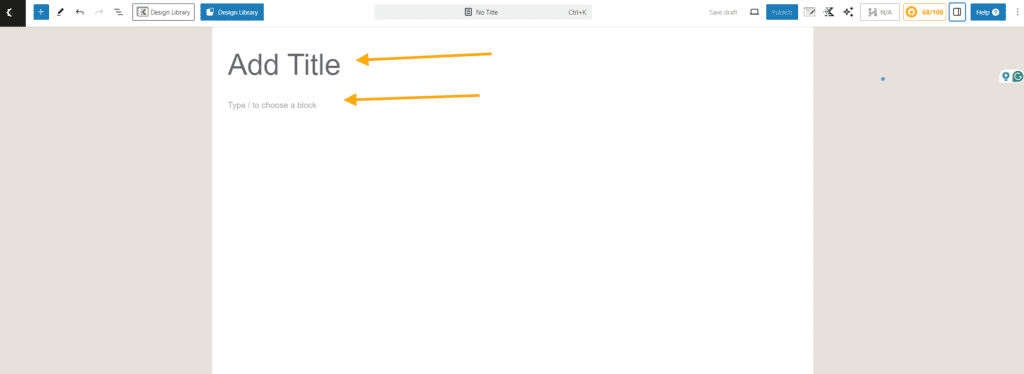
2. Give your page a title and add your content
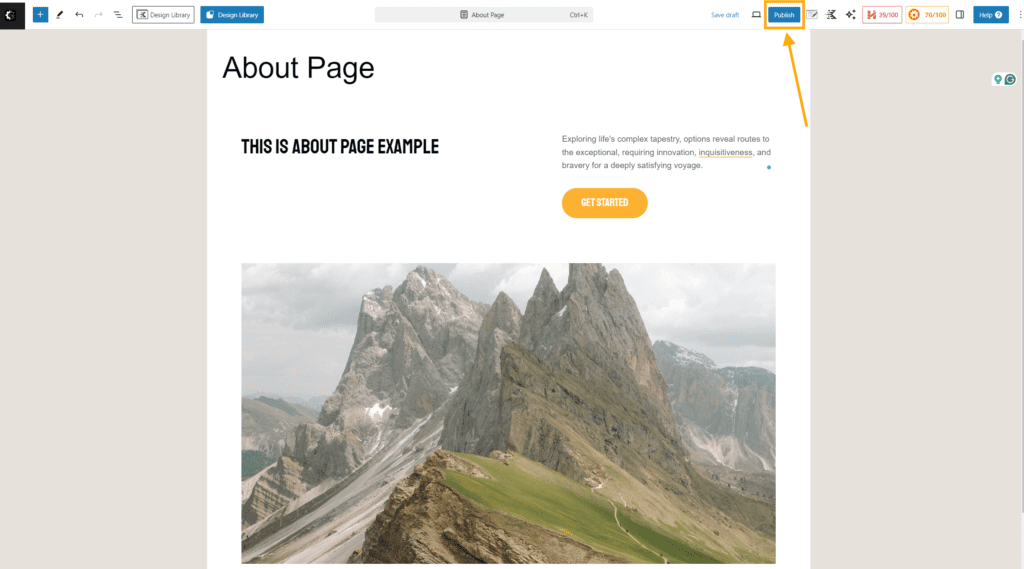
3. Once you’ve crafted the perfect content for your About page, it’s time to share it with the world. Click the “Publish” button to make your page live and accessible to visitors.
Step 6: Install Essential WordPress Plugins
Plugins add functionality to your WordPress blog. Here are some essential plugins for new bloggers:
- Yoast SEO: Helps optimize your content for search engines
- Akismet: Protects your blog from comment spam
- WPForms Lite: Creates contact forms easily
- Jetpack: Offers various features including site stats and social sharing
1. To install plugins:

2. Search for the plugin you want, once you’ve found the desired plugin, click the “Install Now” button.
WordPress will download and install the plugin. This process may take a few moments.

3. Once the installation is complete, you’ll typically see an “Activate” button. Click this to enable the newly installed feature or software.

Step 7: Write Your First Blog Post

Now comes the exciting part – creating your first blog post! Here’s how to get started:
In your WordPress dashboard, go to Posts > Add New

- Give your post a catchy title
- Write your content, breaking it up into paragraphs and using headings for structure
- Add images or other media to make your post more engaging
- Use the Yoast SEO plugin to optimize your post for search engines
- Click “Publish” when you’re ready to share your post with the world
Step 8: Promote Your Blog and Grow Your Audience
Creating great content is just the first step. To build an audience, you need to promote your blog:
- Share your posts on social media
- Start building an email list
- Engage with other bloggers in your niche
- Consider guest posting on other blogs
- Use SEO techniques to improve your search engine rankings
Conclusion: Your Blogging Journey Begins
Congratulations! You’ve now learned how to start a blog using WordPress and Namecheap hosting. Remember, blogging is a journey – it takes time to build an audience and find your voice. Stay consistent, keep learning, and most importantly, enjoy the process of sharing your passion with the world.
FAQs About Starting a Blog
.
I hope this guide has given you the confidence to start your own blog. If you have any questions, feel free to leave a comment below.
Happy blogging!


![How to Write Engaging Blog Posts: A Beginner’s Guide [10 Tips for 2024]](https://yakirdigital.com/wp-content/uploads/2024/07/Yakir-Digital-Feature-Image-1-768x402.jpg)
